Archive
Hyper-V 2016 Tp5: Hyper-V Manager Console new features
Here are some important information and improvements Microsoft released for Hyper-V Manager in Tp5:
- Alternate credentials support. You can now use a different set of credentials in Hyper-V Manager when you connect to another Windows Server 2016 TP5 or Windows 10 remote host. You can also save these credentials to make it easier to log on again.
- Previous version management: the New Hyper-V Manager will allow you to manage versions manage computers running Hyper-V on Windows Server 2012/R2 and Windows 8.x client version.
- Updated management protocol – Hyper-V Manager has been updated to communicate with remote Hyper-V hosts using the WS-MAN protocol, which permits CredSSP, Kerberos or NTLM authentication. When you use CredSSP to connect to a remote Hyper-V host, you can do a live migration without enabling constrained delegation in Active Directory. The WS-MAN-based infrastructure also makes it easier to enable a host for remote management. WS-MAN connects over port 80, which is open by default.
- No more Integration services for Windows Virtual Machines. Updates to integration services for Windows guests are distributed through Windows Update. For service providers and hosting companies, this puts the control of applying updates into the hands of the tenants who own the virtual machines. Customers (tenants Administrators) can now update their Windows virtual machines with all updates, including the integration services, using a single method.
- Integration services for Linux and FreeBSD Virtual Machines. Hyper-V supports both emulated and Hyper-V-specific devices for Linux and FreeBSD virtual machines. Linux Integration Services (LIS) or FreeBSD Integration Services (BIS) , the collection of drivers that are required to run Hyper-V-specific devices, has been added to the Linux kernel and is updated for new releases, but Linux distributions based on older kernels may not have the latest enhancements or fixes. Microsoft provides a download containing installable LIS drivers for some Linux installations based on these older kernels.
Note: As some Linux distributions include versions of LIS, make sure you install the latest downloadable version of LIS, if applicable, for your installation.
Download:
- Download Windows Server 2016 Technical Prevew from the Evaluation Center.
- Download Microsoft Hyper-V Server 2016 Technical Prevew from the Evaluation Center.
Installing Hyper-V role on Windows 2016 Server TP2 MinShell version
As you probably are aware of, Windows 2016 Server TP2, comes with 2 installation options. You also probably have noticed as well that the graphical user interface (GUI) is no longer an option in a default install on the Technical Preview 2.NOt even Start Menu.

- Windows Server Technical Preview 2 option, will install the server with MinShell (Minimal Shell no GUI). Assuming that you will manage the host remotely you won’t need graphical interface at all and from a security point of view, it is the better option.

- Windows Server Technical Preview 2 (with local admin tools) option, will install the server again with MinShell, but includes Server Manager and the other GUI administration tools, although no desktop experience (traditional desktop), nor start menu.
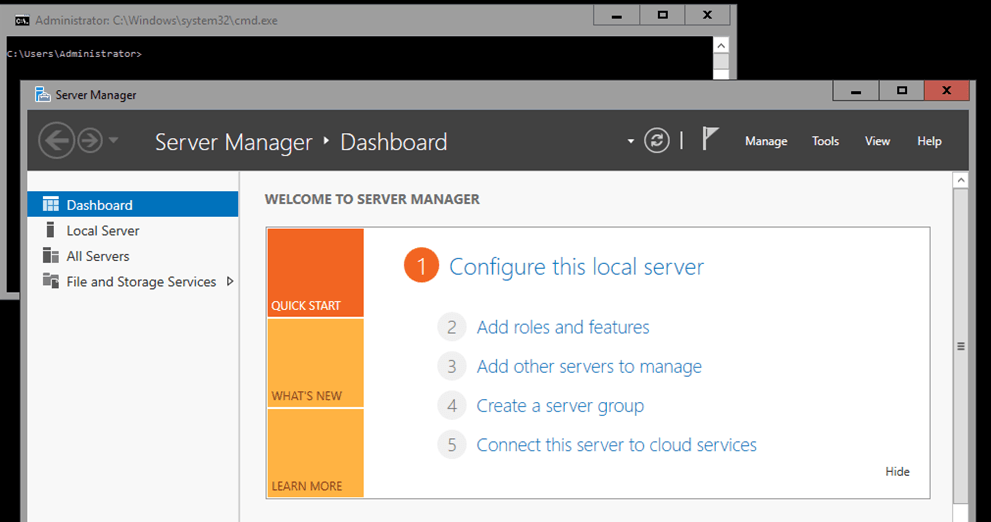
To install Hyper-V role in the Windows Server Technical Preview 2 (with local admin tools) option, in the Server Manager console, click on Add roles and features and select Hyper-V.
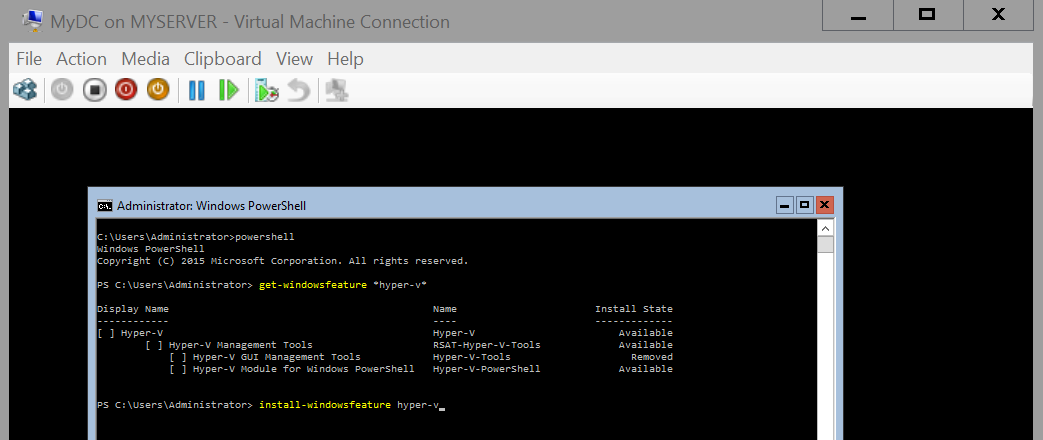
To install Hyper-V role in the Windows Server Technical Preview 2 option :
in the command prompt, type:
PowerShell
PS: > Install–WindowsFeature Hyper-V
Note: If the installation fails due to “The source files could not be found” error, assuming the Windows Server Technical Preview 2 ISO image connected to the DVD drive (D:), type:
Simple as that!
Solved: Wireless not connecting after installing Windows Server TP2
Issue:
Wireless network does not connect on Windows Server TP2 after enabling Wireless Services and installing Wireless Drivers
Solution:
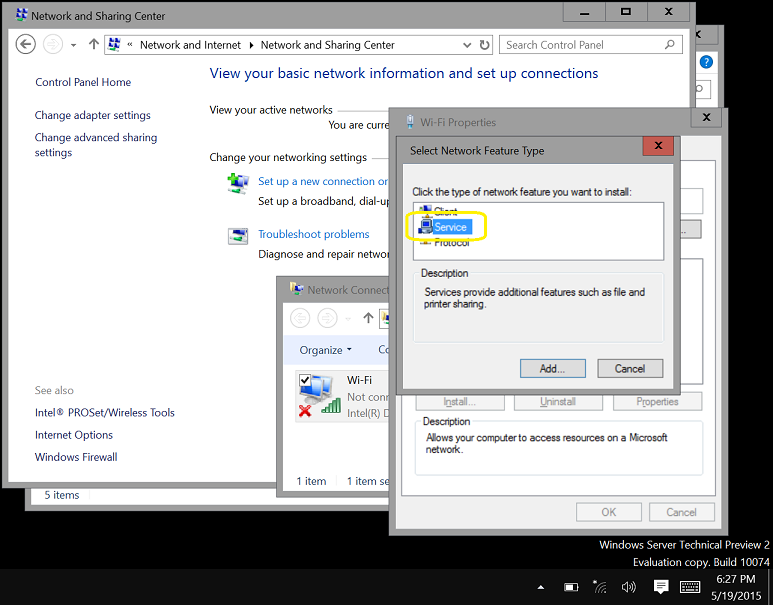
Add the Native WiFi Filter SERVICE in the properties of the wireless adapter
To be more specific:
- In the Network and Sharing Center, click on Change Adapter Settings and then on the network connections, select the Wireless Network, right click and select Properties.
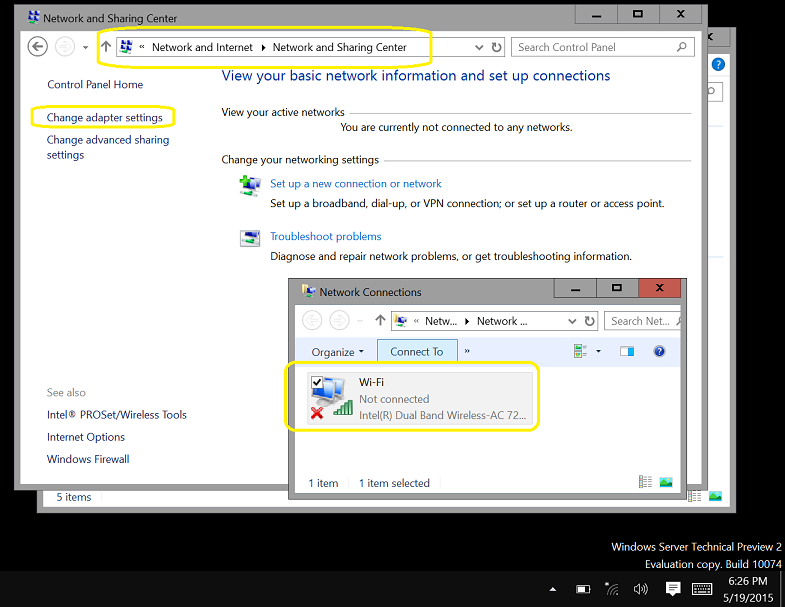
2. In the Properties on the Wireless Adapter, click on Install
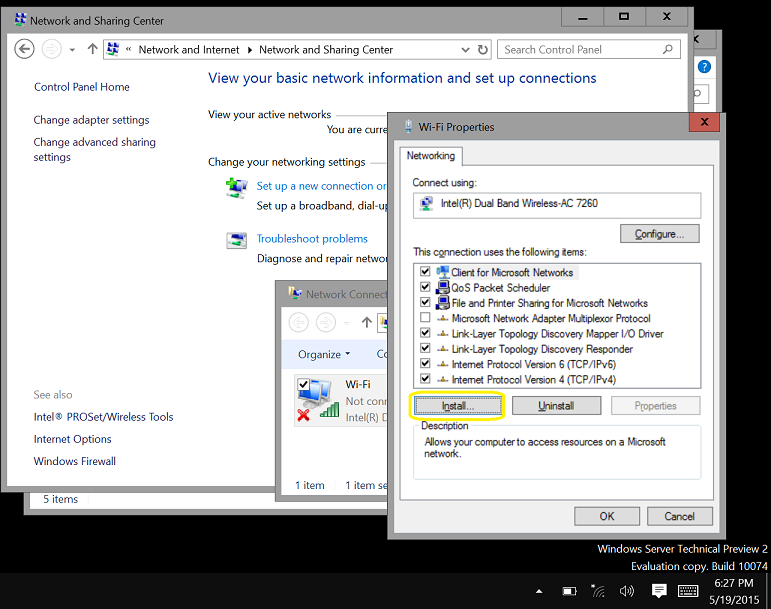
3. Select Service and click on Add
4. Select Native WiFi Filter and click on OK 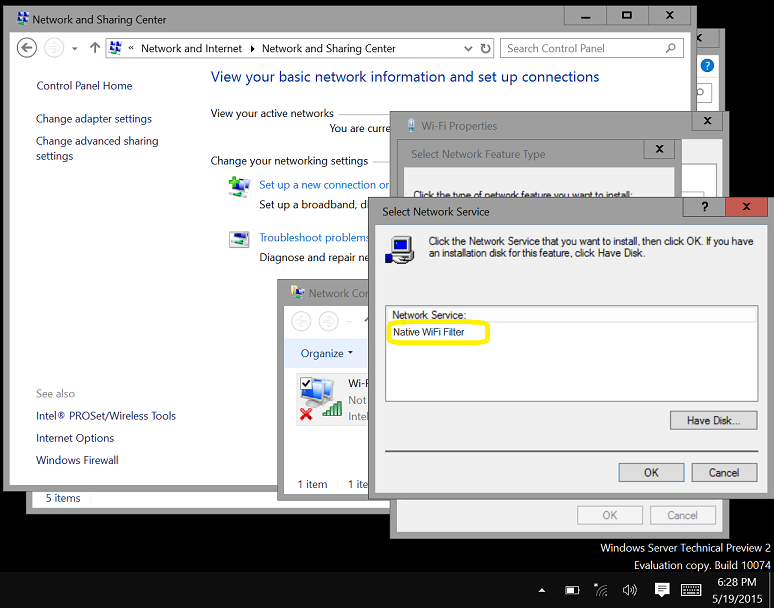
5. Done. You will be able to connect to a WiFi connection now.
Recommended Books


System Center 2012 R2 Virtual Machine

System Center Virtual Machine Manager 2012 Cookbook

