Archive
Removing the ghost Hyper-V vNic adapter when using Converged Networks after in-place upgrade to W2012R2
Scenario:
You have a Windows 2012 with NIC Team configured, Hyper-V Virtual Switch and vNIC’s and you have done an in-place upgrade to Windows 2012 R2
What will happen:
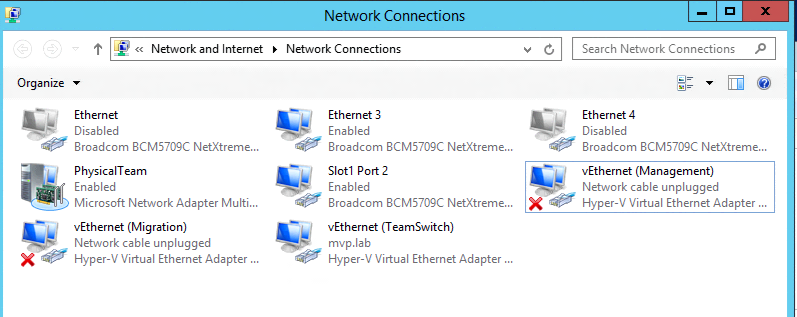
You will find out that the Hyper-V Virtual Nic Adapter (vNIC) is disconnected (as shown below). As you can see, the Management and Migration vNIC’s are showing as network cable unplugged.
You can also use wmi to query for the vNIC’s (pictured below):
gwmi -nnamespace root\virtualization\v2 -Class MSVM_InternalEthernetPort | select elementname

What should you do to avoid this situation:
Recommendation: Before upgrading from Windows 2012 to Windows 2012 R2, make sure you remove the Hyper-V Virtual Switches and the Network Team (in this order).
What you could do if you did not follow the recommended approach:
Below I describe the step by step that you need to take in order to get the ghost vNIC’s removed.
Note: The following process was certified by Ben Armstrong (aka Virtual PC Guy), Microsoft PM for Hyper-V and it is supported by Microsoft, as a valid similar approach that fix the Physical Networking by using the registry, as per MS KB : http://support.microsoft.com/kb/146333 ( don’t follow the method described in that article, to fix the VNIC issue.)
Steps:
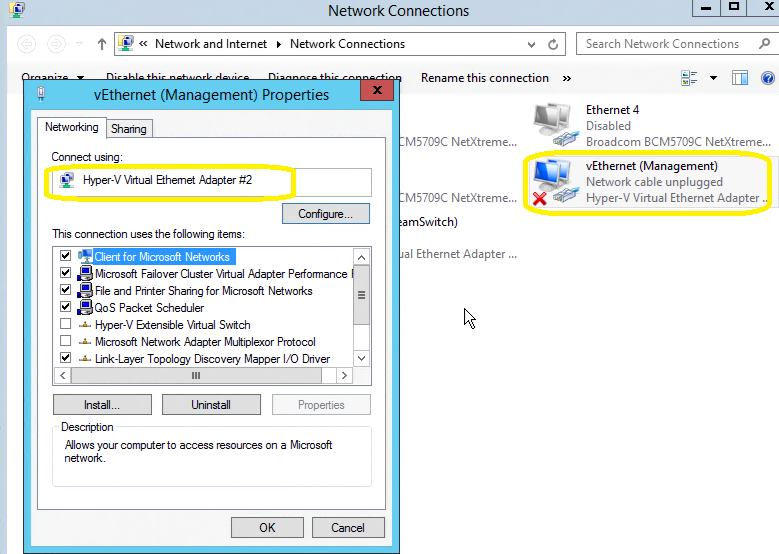
1. in the Network Connections, take note of the vNIC name (e.g. Hyper-V Virtual Ethernet Adapter #2) in the properties: Select the vNIC (e.g. Management), right click properties ( as per below):
2. Open the registry: Windows Key + R, then type regedit
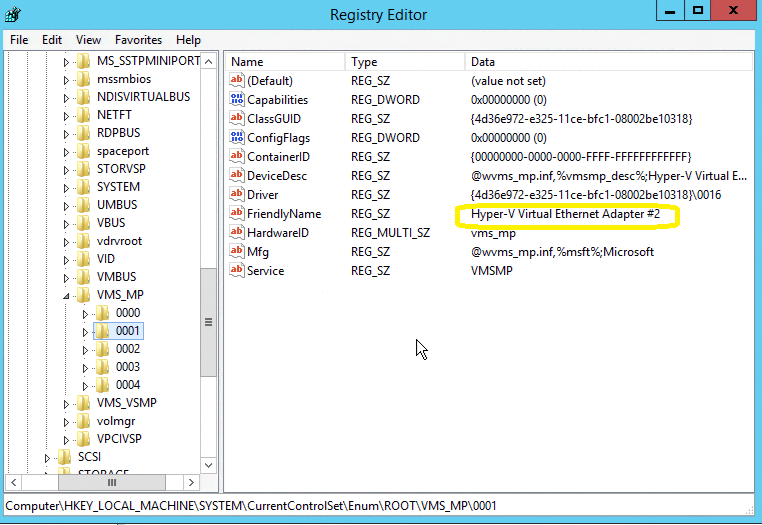
3. Locate the following Key: HKEY_LOCAL_MACHINE\SYSTEM\CurrentControlSet\Enum\ROOT\VMS_MP
4. Go though the folders until you find the folder that contains the FriendlyName with the SAME name of the ghost vNIC
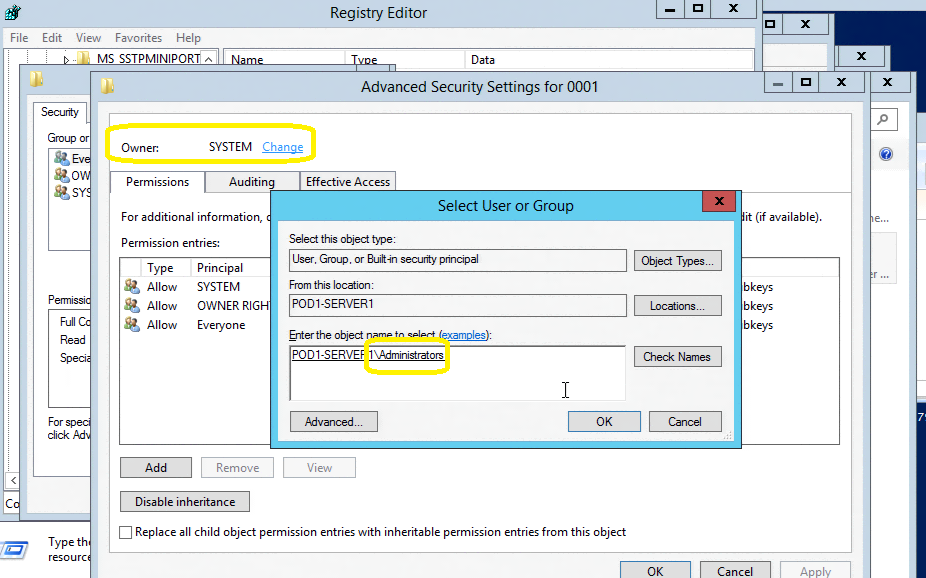
5. Select the Folder, right click and select Permissions, click on Advanced and replace the owner of the folder to Local Server Administrators (currently: System), by clicking on Change, typing Administrators (make sure the From this location show your server name) and click OK.
6. Disable the inheritance by clicking on Disable inheritance and then clicking on Convert inherited permissions into explicit permissions on this object and then add the local server Administrators group with Full Control

7. Select all the objects INSIDE the folder, right click and click on Delete
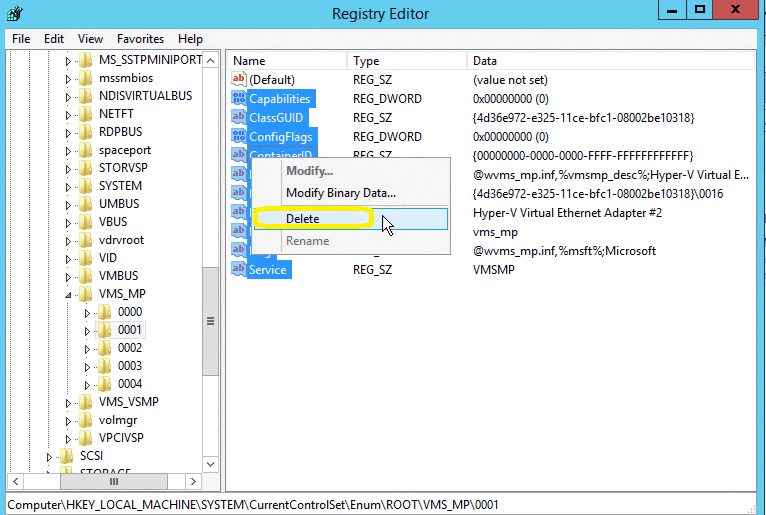
8. Repeat the steps 5-7 for all ghosts vNIC’s and close the registry
9. Open the Device Manager: Windows Key, type Device Manager and click on Scan for Hardware Changes. ( Select the Server Name, Click on Action and then Scan for Hardware Changes)
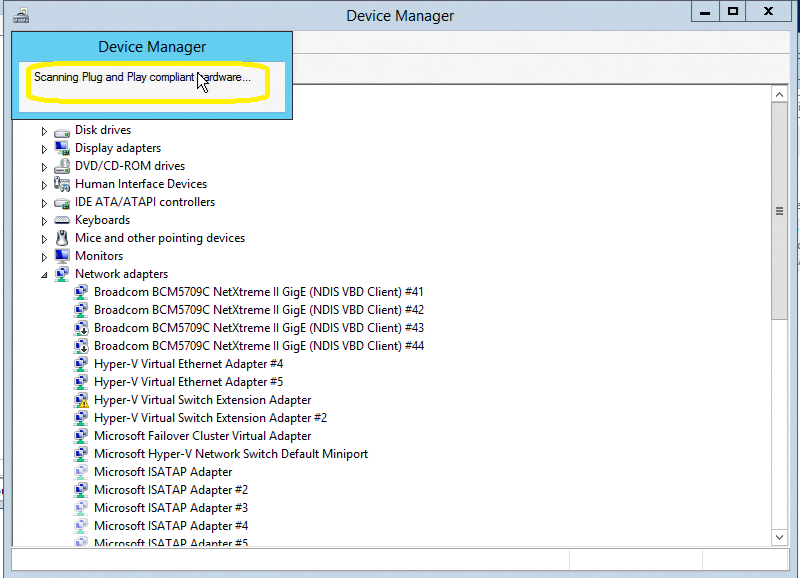
…and you are done! All fixed. Go back to Network Connections and refresh and you will noticed that the ghosts vNIC’s are all gone.
Thanks to Ben Armstrong, who actually found this solution and Taylor Brown.
Recommended Books


System Center 2012 R2 Virtual Machine

System Center Virtual Machine Manager 2012 Cookbook

